FX Vortex 2.0 — Gravity-Zone Signals with 3 Take Profit Levels
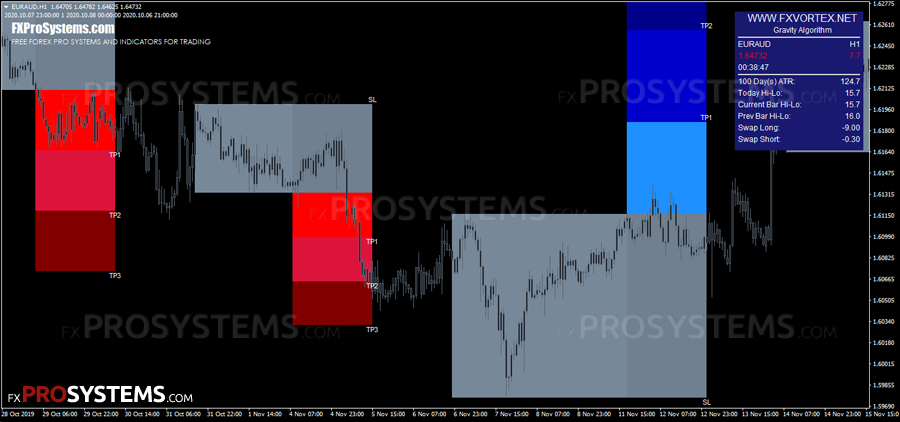
FX Vortex 2.0 (or Vortex Sniper 2.0) is a combination of several analytical algorithms that together are capable of generating accurate buy / sell signals. The signals are intuitive and will not be difficult even for novice traders. The system can be used on any timeframe with major currency pairs. And of course no repainting - Vortex 2.0 100% non-repaint.
Characteristics of the FX Vortex 2.0
- Platform: Metatrader4
- Currency pairs: Any currency pairs, recommended major (confirmed not to display signal zones correctly on indices — forex pairs only)
- Trading Time: Any
- Time Frame: M5 and higher
- Recommended broker: Roboforex | XM | VT Markets
How it works? Trading rules by Vortex Sniper 2.0
The system offers a choice of 4 templates for different market situations:
- FXVORTEX1, FXVORTEX2 - for low volatility market
- FXVORTEX3 and FXVORTEX4 - for high volatility markets
Which file goes with which template? Each template loads its own matching indicator file automatically — you don't need to attach anything manually:
FXVORTEX1.tpl→FXVORTEX.ex4FXVORTEX2.tpl→FXVORTEXA.ex4FXVORTEX3.tpl→FXVORTEXB.ex4FXVORTEX4.tpl→FXVORTEXC.ex4
Update (23.03.2020) from the developer: "Since the volatility on the markets has drastically increased, we have introduced the 3rd and 4th template (FXVORTEX3 and FXVORTEX4) and 2 more indicators. We recommend those templates as standard until the markets go back to standard volatility."
In short: start with FXVORTEX1 or FXVORTEX2 for calmer, standard market conditions. If you open a chart and see very few signals, switch to the FXVORTEX3 or FXVORTEX4 template — these are tuned for higher-volatility conditions and less popular pairs.
You can choose the template that suits you best. And now you are ready to trade.
The signal appears as a gray rectangle when all the conditions of the system's trading algorithms are met.
BUY trade

Price still in the narrow range. Waiting for signal:

When the price breaks the upper border of the gray channel, a BUY signal appears and the recommended Stop Loss levels and three Take Profit levels (TP1, TP2 and TP3):

The trade should remain open until it hits take profit. As we can see on the below example it went much higher than the TP3 level:

SELL trade
A sell signal is generated in the same way as a buy signal.
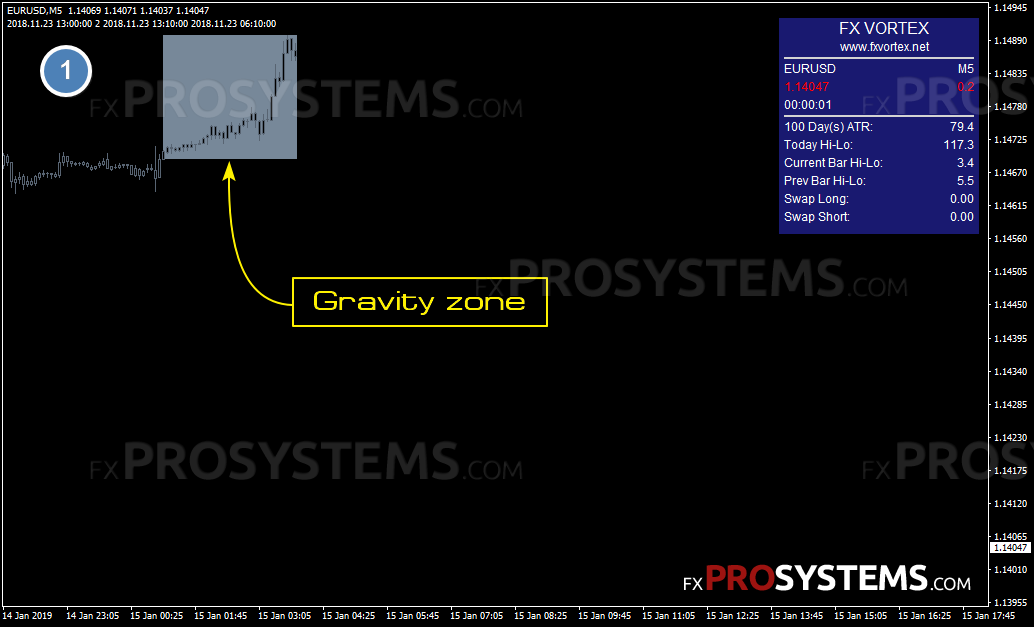
We are waiting for the signal to appear:

When the price crosses the lower border of the gray rectangle, a sell signal appears. The red zones will show us the Take Profit levels. Stop Loss at the upper border of the gray rectangle:

As we can see in the example below, the price dropped much below the TP3 level:

Why three Take Profits? Here is what the author of this system answers to this:
Each signal gives us 3 different take profit levels. This number is not accidental, because it reflects every type of trader from a very conservative one, through a standard one to a much more favorable RR ratio.
How to use it correctly? The simplest method is to observe the price. If it moves quickly and dynamically, we can usually count on TP3. If it has difficulties with volatility, or the market is just about to close an important trading session (like EU or US), it’s better to aim for lower values like TP1 or TP2
You can see the work of the FX Vortex 2.0 more clearly in this video:

In the archive FX_Vortex_2.rar (2,71 M):
- FXVORTEX.ex4
- FXVORTEXA.ex4
- FXVORTEXB.ex4
- FXVORTEXC.ex4
- VortexDash.ex4
- FXVORTEX1.tpl
- FXVORTEX2.tpl
- FXVORTEX3.tpl
- FXVORTEX4.tpl
- FXVORTEX - Users Manual.pdf
Free Download FX Vortex 2.0






 :-
:-
